 Michael Shafer
How to forward emails via Zapier to create new contacts in Airtable
Instead of manually creating new contacts in your Airtable CRM, this post will show you how to automatically create contacts by forwarding emails to a special Zapier Email Parser email address:
 Forwarding an email to Airtable via Zapier
If you receive emails from prospective customers, this is a very handy way to capture them in your database.
Here’s an overview of the process:
- Step 1: Create a Zapier account
- Step 2: Set up your Zapier Email Parser Mailbox
- Step 3: Send an example email to Zapier
- Step 4: Set up the parsing template
- Step 5: Create a new Zap to create new records in Airtable
Step 1: Create a Zapier account
For some reason Zapier Email Parser is somewhat isolated from the main Zapier website, but you can still log in with a Zapier account, so go and create one first at https://zapier.com/sign-up/.
Step 2: Set up your Zapier Email Parser Mailbox
Head to https://parser.zapier.com/ and click the “Create Mailbox” button.
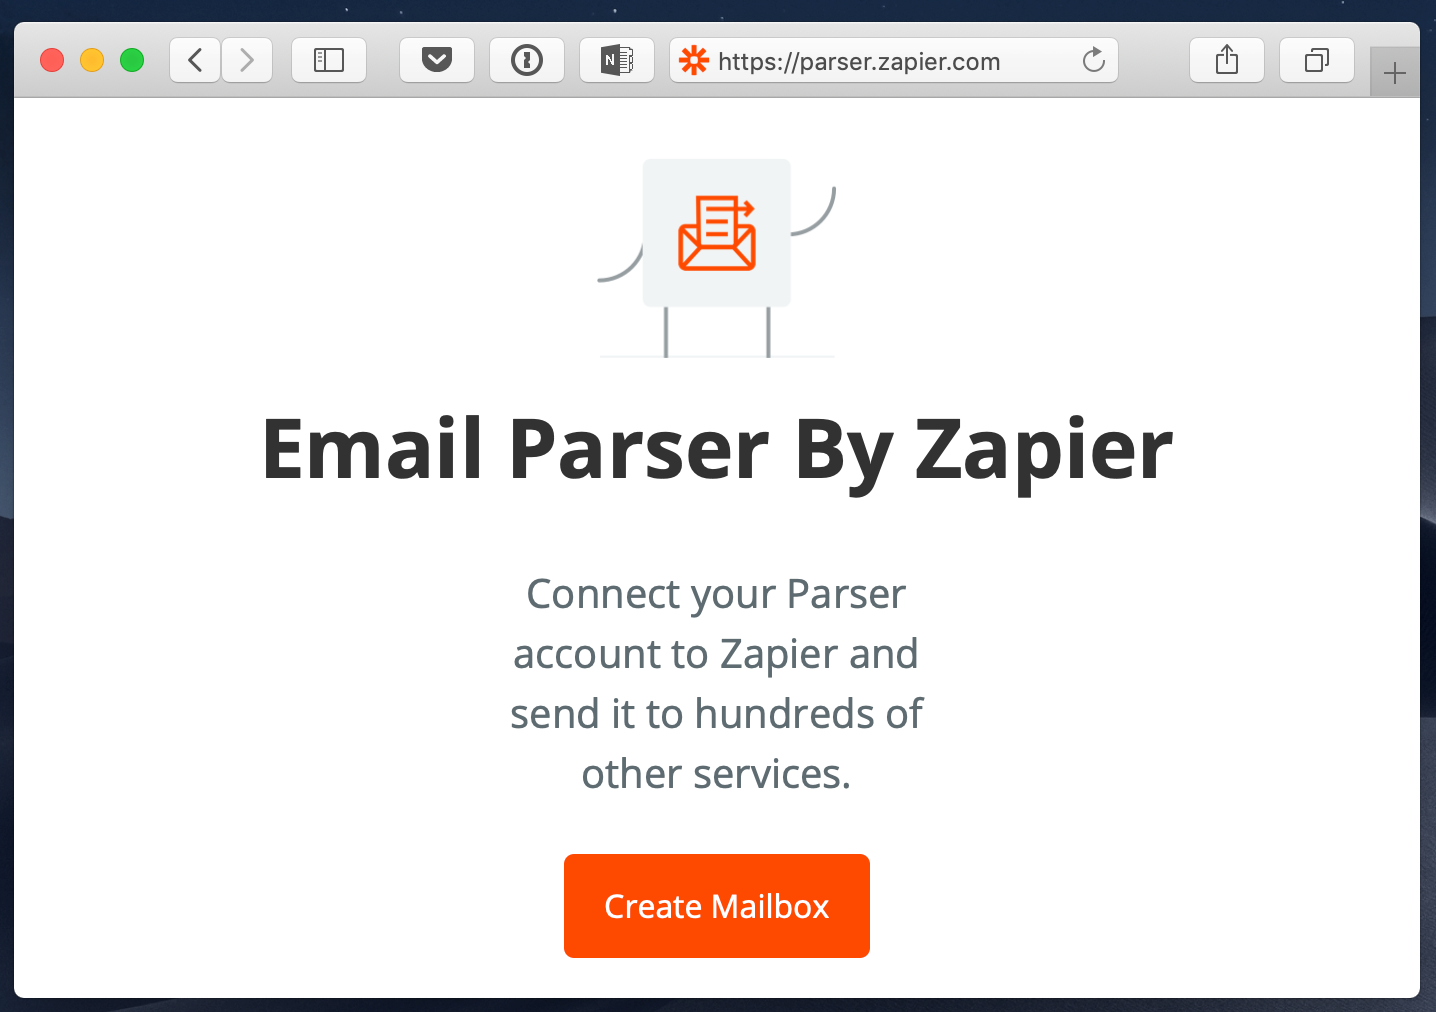 Home screen of Email Parser by Zapier
Make a note of the unique email address that gets created for you.
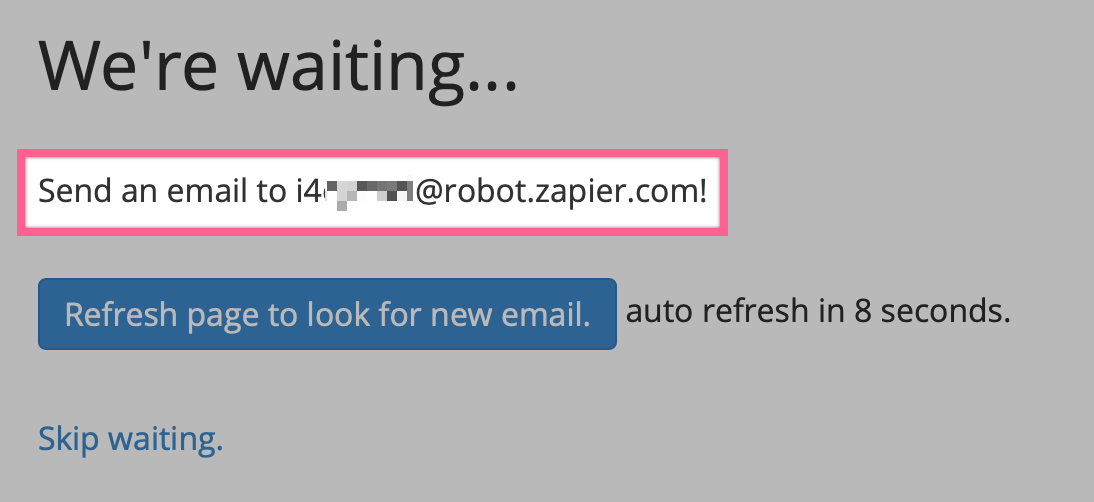 A new mailbox in Zapier Email Parser with a unique email address
Any emails sent to this mailbox will automatically trigger an action: we’re going to use this one for emails from prospective customers, but you could create more mailboxes for other automation workflows.
Step 3: Send an example email to Zapier
Now we need to send Email Parser an example of the email we’d like it to parse. Find an example in your inbox and click forward, but don’t send it yet!
Feel free to add any extra information in the email body, if you think it will be useful to save in your Airtable base. For example, below I am adding a line of notes as the first line of the email. Soon we will configure the parsing template to extract all of the relevant bits from our email.
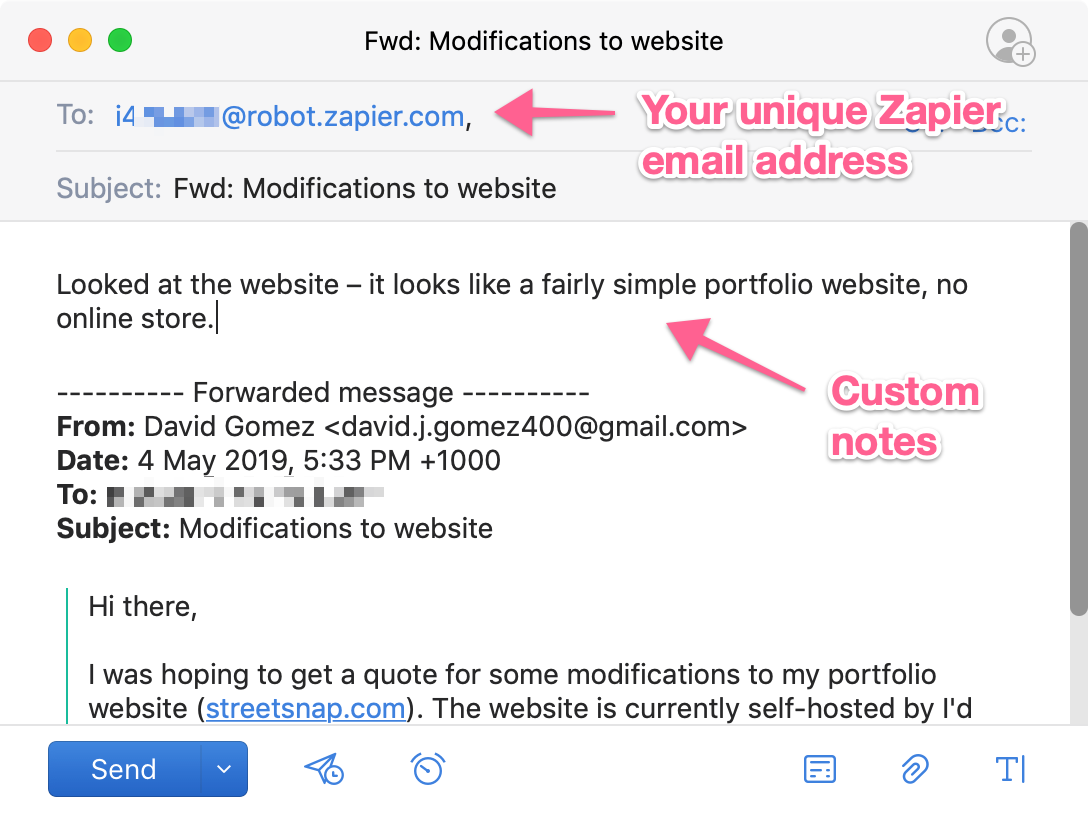 Forwarding an email from a prospective customer to Zapier
If you wanted to capture more than just one line of notes, you could format your custom content like this:
Notes: These are my notes
Reminder: 24 August 2019

---------- Forwarded message ----------
...
Step 4: Set up the parsing template
Go back to Zapier Email Parser and with any luck, it will be displaying the email you just sent. Now we’re going to pluck out all of the pieces of information contained in the email by highlighting the example information and giving each field a name:
 Extracting pieces of information from an email
My final template looks like this:
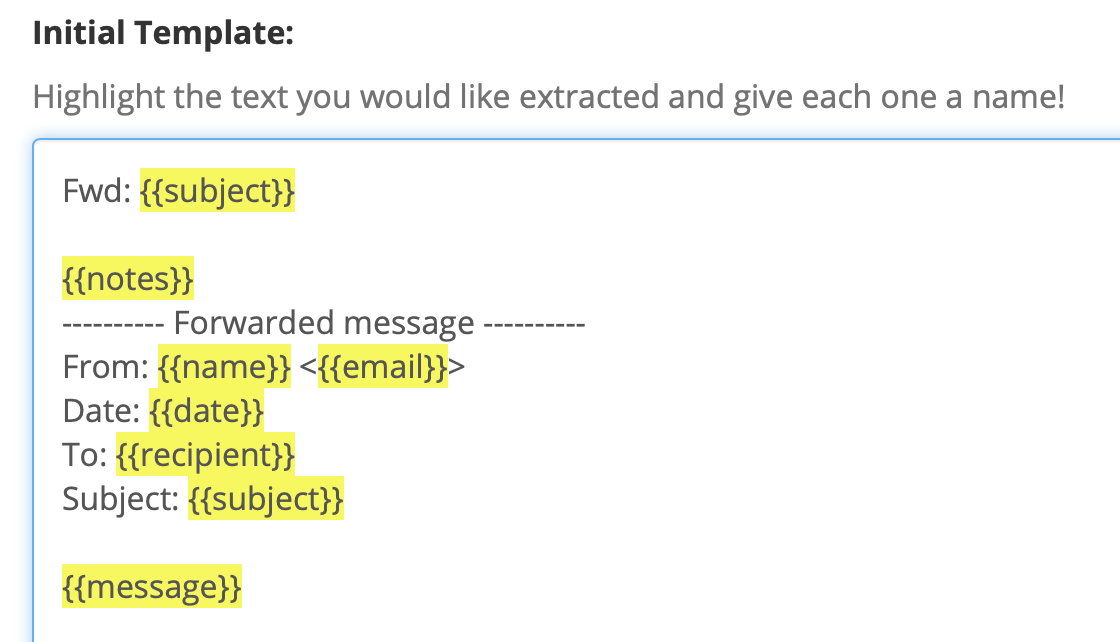 Final template with fields extracted from the email
Once your template is looking good, scroll down and click “Save Address and Template”.
Step 5: Create a new Zap to create new records in Airtable
Start clicking through Zapier’s Zap making workflow!
Choose the action and trigger
From the Zapier homepage, create a new Zap that connects “Email Parser by Zapier” with “Airtable”. You want the trigger to be “New Email”, and the action to be “Create Record”:
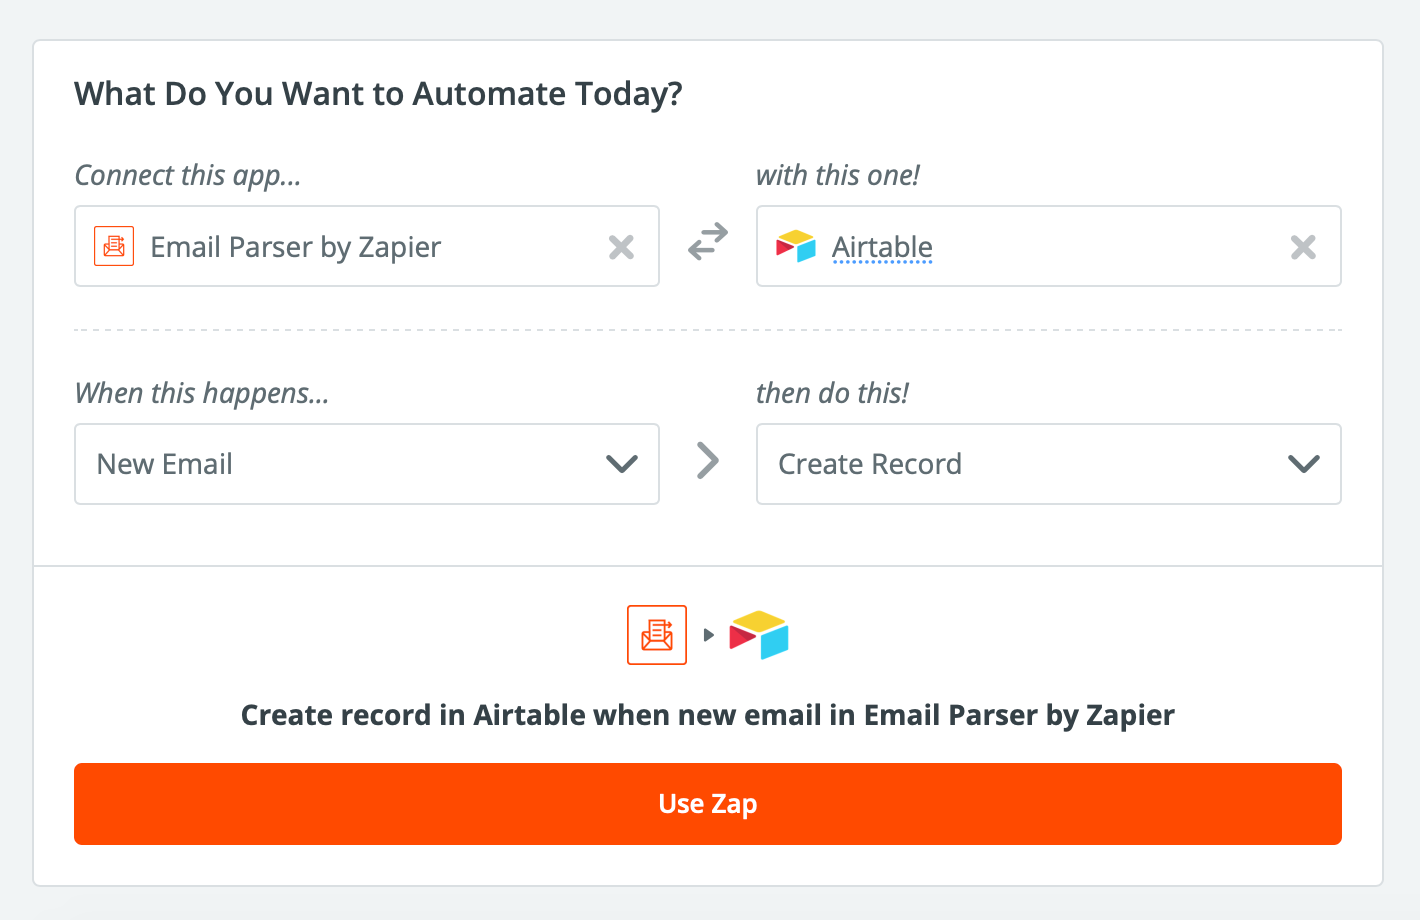 New Zap to create a new Airtable record when an email is parsed
Connect to your “Email Parser by Zapier” mailbox
After clicking “Use Zap”, you’ll be asked to connect your “Email Parser by Zapier” account — just log in with your Zapier account for this. For the next steps, choose the mailbox and sample email you created earlier.
Hook up your Airtable account
Click through the next few steps to confirm “Airtable” and “Create Record” as the action for this zap, and connect to your Airtable account.
Populate all of the relevant fields in your Airtable base
On the “Set up Airtable Record” screen, you get to map the fields extracted from your email to the relevant fields in your Airtable table.
Use the insert field buttons to the right to find the data you want to insert. Any fields you extracted in your email template will be called Parse Output {XXX} in the list of available fields. Here are the fields I mapped:
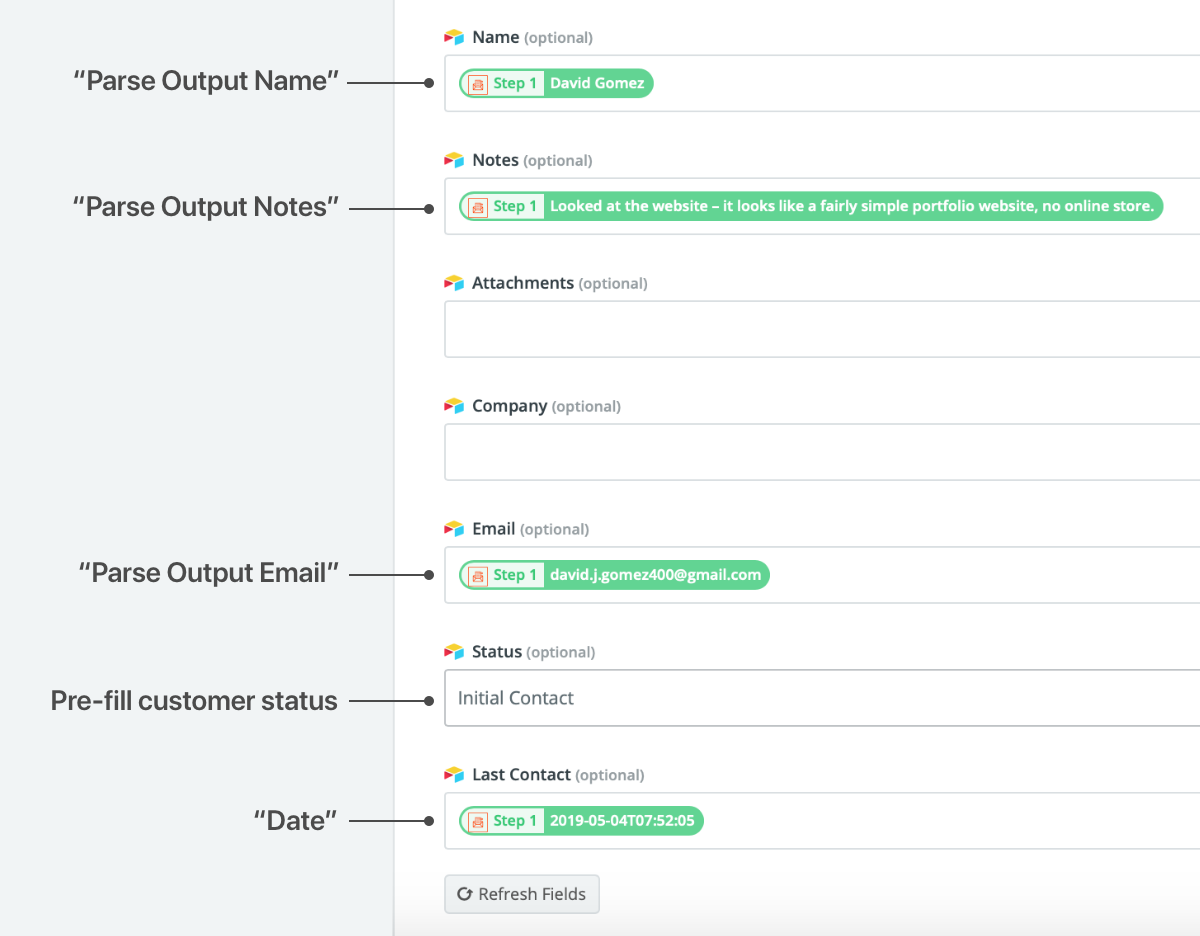 Mapping fields from our parsed email to Airtable fields
You have flexibility here to fill in whatever information you need to save to Airtable — you could insert multiple fields or include pre-set strings, as I’ve done by pre-filling the “Status” field to “Initial Contact”.
Test it out
Save your field mappings and tell Zapier to send a test record to Airtable. If you go back to your Airtable base you’ll hopefully see the new record in your Contacts table! 👏🏼
Finsh and activate your Zap
Finally, for the most satisfying bit, turn on your Zap so it will automatically run whenever you forward a new email:
 Finish and activate the Zap
All done
You should now be able to forward emails and watch the new rows appear in your Airtable base, like this:
Forwarding an email to Airtable via Zapier
Now all you need to do is save your unique Zapier email address to your contacts list for easy searching in your email client, and start firing off emails! It’s a pretty simple workflow, but you could replicate this technique to cut out other mundane tasks in your day-to-day.